<dialog> : Dialog element

Introduction

The <dialog> element is an HTML5 feature designed to represent a dialog box or window within a web page. It allows developers to create modal dialogs or pop-up windows that can display information, request input, or perform specific tasks without navigating away from the current page.

Here’s a basic example of how the <dialog> element can be used:

Output :

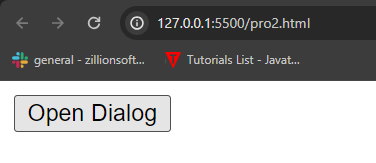
It will show when we run the program. and when we click on the “Open Dialog” button a pop up message is given.

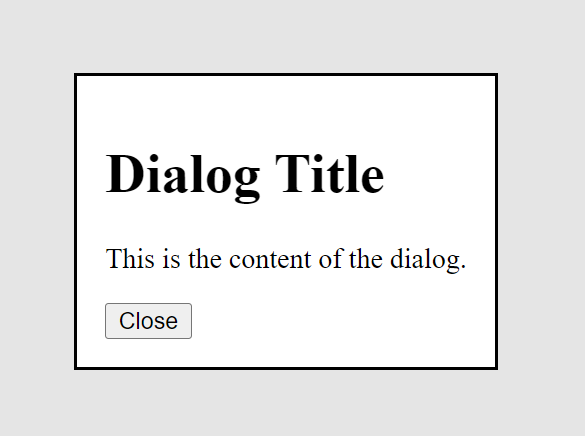
Like this and when we click on “Close” button it will be disappear.

In this example:

  • The <dialog> element represents the dialog box, with its content and controls.
  • The showModal() method is used to display the dialog as a modal window, blocking interaction with the rest of the page until it is closed.
  • The close() method is used to close the dialog.
  • Buttons or other elements within the dialog can be used to control its behavior.

It’s important to note that browser support for the <dialog> element may vary, and in some cases, it may require polyfills or additional JavaScript to work consistently across different browsers. Additionally, the <dialog> element has been deprecated in the HTML Living Standard, meaning its future is uncertain, and developers are encouraged to use other approaches for creating modal dialogs, such as custom JavaScript implementations or third-party libraries.

<hgroup> : Heading Group element

Introduction

The <hgroup> element represents a heading and related content. It groups a single <h1> – <h6> element with one or more <p>.

It was intended to help with document outlining and provide better semantic structure for web pages, especially in cases where multiple headings were used for a single title or headline.

Here is an example of this :

Output :

In practice, however, it didn’t offer significant benefits over using a single <h1> followed by other lower-level headings. Therefore, web developers were encouraged to use appropriate heading levels (from <h1> to <h6>) without nesting them within an <hgroup> element.

<var> : Variable element

Introduction

The <var> element is used to represents the name of a variable in a mathematical expression or a programming context. It’s typically presented using an italicized version of the current typeface, although that behavior is browser-dependent.

Here is an example of <var> tag :

Output :

In this example:

  • The <var> element is used to represent the mathematical symbol “π”, which stands for pi.
  • The <sup> element is used to denote the exponentiation.
  • Together, they represent the formula for calculating the area of a circle.

The <var> element is purely semantic, meaning it’s used to convey meaning about the content it contains, rather than having any effect on the appearance or behavior of the text. However, browsers typically render the content of <var> in italics by default, which is often appropriate for denoting variables in a technical context.

It’s worth noting that while <var> is primarily used for representing variables, it can also be used to represent placeholders for variable content in a more general sense, not limited to mathematical contexts.

<textarea> : Textarea element

Introduction

The <textarea> element in HTML is used to create a multi-line text input field, allowing users to enter longer-form text or comments. It’s commonly used in forms where users need to input larger amounts of text, such as messages, reviews, or descriptions.

Here’s a basic example of how you might use the <textarea> element:

Output :

In this example:

  • The <textarea> element has an id attribute (message) that associates it with the <label> element.
  • It also has a name attribute (message), which is used when submitting the form data to the server.
  • The rows and cols attributes determine the initial size of the text input area in terms of rows and columns.

When the form containing the <textarea> element is submitted, the value entered by the user (or modified by the user) within the <textarea> will be sent to the server along with other form data.

The <textarea> element is useful for capturing longer-form user input and provides a more user-friendly interface compared to single-line input fields for longer text entries.

<time> : Time (Date) element

Introduction

The <time> element in HTML is used to represent dates and times in a machine-readable format. It allows you to specify a specific point in time, a duration, or a range within a document. The content inside the <time> element can be a specific date and time, a duration, or a combination of both.

Here are a few examples of how you might use the <time> element:

1. Specific Date and Time:

Output :

2. Duration:

Output :

3. Range:

Output :

In each of these examples, the datetime attribute is used to provide the machine-readable date and time format in the ISO 8601 format. This format allows browsers and other user agents to parse and understand the date and time information, aiding accessibility and search engine optimization.

The content inside the <time> element is typically displayed to users as-is, providing human-readable information about dates, times, durations, or ranges. However, it’s important to note that the datetime attribute is what conveys the machine-readable information, making it useful for developers and assistive technologies.

<tfoot> : Table Foot element

Introduction

The <tfoot> element in HTML represents the footer section of a table. It is used to define the footer rows of a table, which typically contain summary information or totals for the data presented in the table.

Here’s how you might use <tfoot> in conjunction with <tbody> and <thead> in an HTML table:

Output :

In this example, we show the footer section different from the other section by applying background color on <tfoot> and the <tfoot> element contains one or more <tr> (table row) elements, each representing a row of footer information for the table. These footer rows typically appear below the body content of the table, but before any other content outside the table.

The <tfoot> section is useful for providing summary or aggregate data for the entire table, such as totals or averages. It helps to distinguish this summary information from the main body of the table while maintaining a semantic structure.

<tbody> : Table Body element

Introduction

The <tbody> element in HTML represents the main body of a table where the rows of data are placed. It’s used to group the main content of the table apart from the header rows (contained within <thead>) and the footer rows (contained within <tfoot>, if present).

Here’s how you might use <tbody> in an HTML table:

Output :

In this example, we show the body section different form the other sections of the table by applying background colour on <tbody> and the <tbody> element contains multiple <tr> (table row) elements, each representing a row of data in the table. Each <tr> contains <td> (table data cell) elements, representing the actual data cells within each row.

Using <tbody> helps to semantically structure the table, making it clearer where the main content of the table lies, and it also assists in accessibility by separating the table’s data from its header and footer sections.

<thead> : Table Head element

Introduction

The <thead> element in HTML represents the group of rows in a table that contain the headings of the columns. It’s typically used to structure the top part of a table where column labels or headers are placed. This element is often paired with <th> (table header cell) elements to define those headings.

Here’s a basic example of how you might use <thead> in conjunction with <th>:

Output :

In this example, we will show heading section different by the others by applying background colour on <thead> , and the <thead> element contains one <tr> (table row) element with three <th> elements representing the headings for three columns. The actual data is typically placed within the <tbody> (table body) element, but the <thead> helps structure the table and improve accessibility by associating column headers with their respective data.

<video> : Video Embed element

Introduction

The <video> element in HTML is used to embed video content into a web page. It provides a standard way to embed video files directly into HTML documents, allowing users to view the video content without the need for additional plugins.

Here’s a basic example of how you might use the <video> element:

Output:

In this example:

  • The <video> element defines a video player.
  • The controls attribute adds standard video controls (play, pause, volume control, etc.) to the player.
  • The width and height attributes specify the dimensions of the video player.
  • The <source> element provides the video source using the src attribute, and the type attribute specifies the MIME type of the video file.

You can include multiple <source> elements to provide different video formats (e.g., MP4, WebM, Ogg) to ensure compatibility across different browsers. The browser will choose the first supported video format from the provided <source> elements.

<source> : Video or Image Source element

Introduction

The <source> element in HTML is used as a child of media elements like <audio> and <video>, as well as the <picture> element for responsive images. It specifies multiple media resources for the browser to choose from, allowing for better compatibility and optimization across different devices and browsers.

Here’s an example:

#.Within <audio> or <video> elements:

Outout:

In this example we give a source of video and it will display on the webpage. As well as we can make for picture.